
Contact Info
2nd Floor, House-42, Road-20, Sector-11, Uttara, Dhaka-1230
+8801711-286015
info@tishost.com

cPanel Hosting
317
Jul 19,2019
How to install Perl modules on shared servers
A Perl module is a discrete component of software for the Perl programming language. Perl is supported on all of our Shared/Reseller servers and the Perl Modules menu is available with Stellar Plus and Stellar Business. However, when you try to install a Perl module in the cPanel >> the Perl modules menu, you will face this error:

Most Perl modules are written in Perl, some use XS (they are written in C) so they require a C compiler. Please note that the C compiler is disabled on all of our shared servers as it is a high security threat. However, you can contact our Support Team and we will enable it for you for 3 hours.
Still, it is possible to install any Perl module via the command line without C compiler enabled. You can do it using the SSH connection, the guide on how to access your account via SSH can be found here.
We will use the cpan command to install Perl modules. You can find the full list of available CPAN modules in the official documentation.
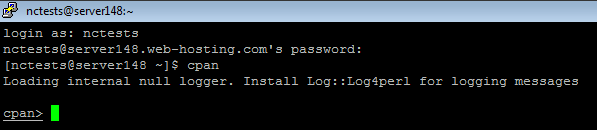
1. After opening the command console, you need to type cpan. This way, you will access the cpan console:
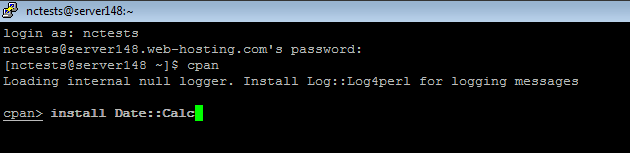
2. The syntax is the following:
install module::name
For example, we will install the Date::Calc Perl module:
3. Most likely, you will see this error message at the end:
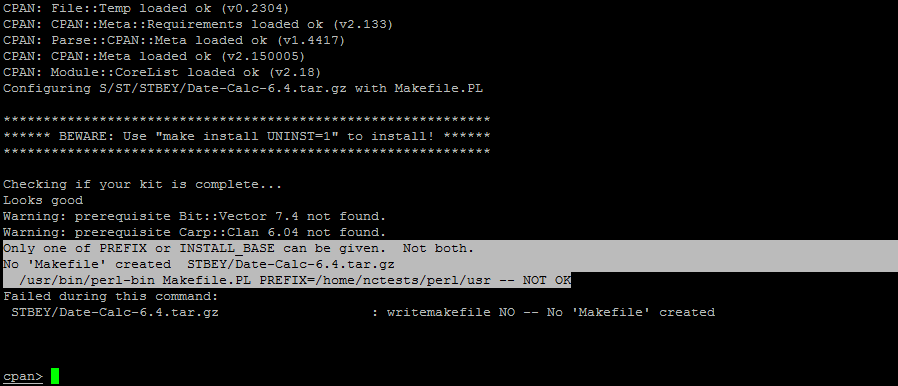
Cpan is configured to provide one setting to Makefile.PL, and Makefile.PL is picking up a conflicting setting from the environment.
Cpan Prefix is pre-configured as PREFIX=/home/USER/perl/usr
However, our servers’ environment is configured to use /home/USER/perl5
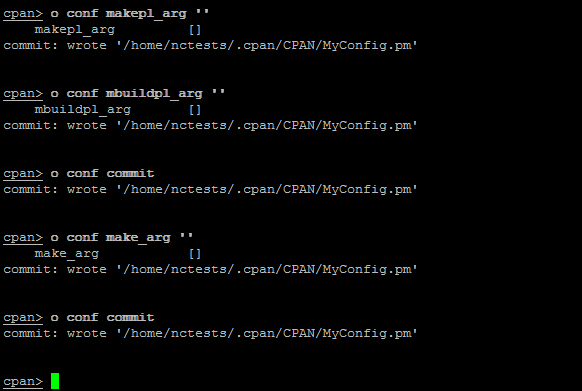
As such, simply tell cpan to stop specifying PREFIX. From within the cpan shell, run these commands:
o conf makepl_arg ''
o conf mbuildpl_arg ''
o conf commit
o conf make_arg ''
o conf commit
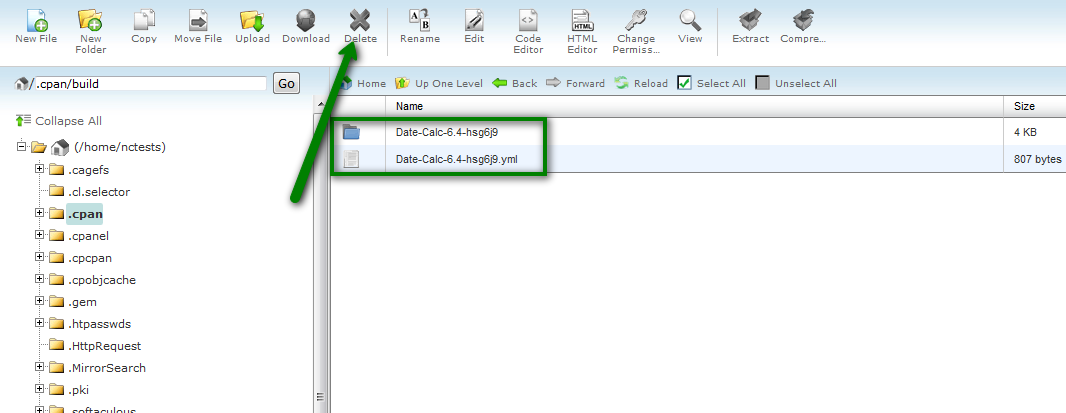
4. Now feel free to run install module::name once again. In case you see an error like below, you need to delete the previous failed build and try again:

In our example, the error shows directory /home/nctests/.cpan/build/Date-Calc-6.4-hsg6j9
You can access it via the cPanel File Manager or using an FTP client and delete it:
5. This is a successful installation log:
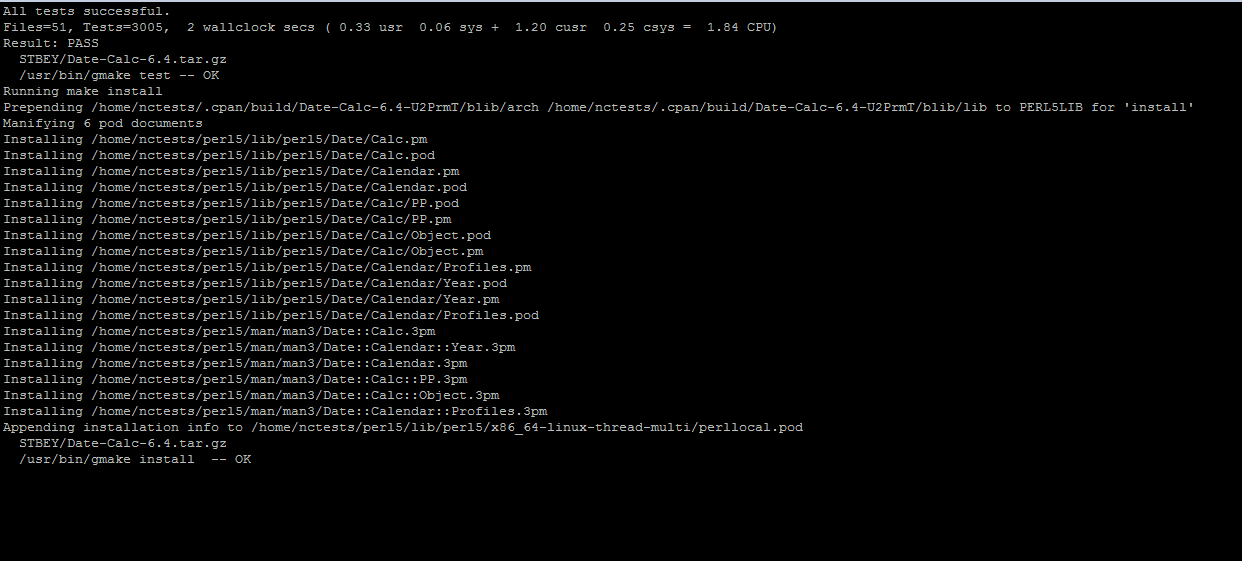
Modules may have dependencies on other modules (almost always on CPAN) and cannot be installed without them (or without a specific version of them).
Sometimes, the installation will ask to install a module (or a few ones), which has/have a dependence.
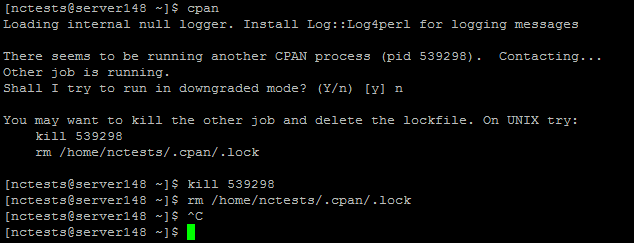
6. After the installation do not forget to type exit in the cpan console to close it and remove the lock file:
![]()
Otherwise, you may see this message after attempting to open it again:

After Shall I try to run in downgraded mode? (Y/n), type n and follow the instructions. You need to kill a running cpan process and remote the lock file manually:
7. Finally, you can open the Perl Modules option in cPanel and check for a new installed module.
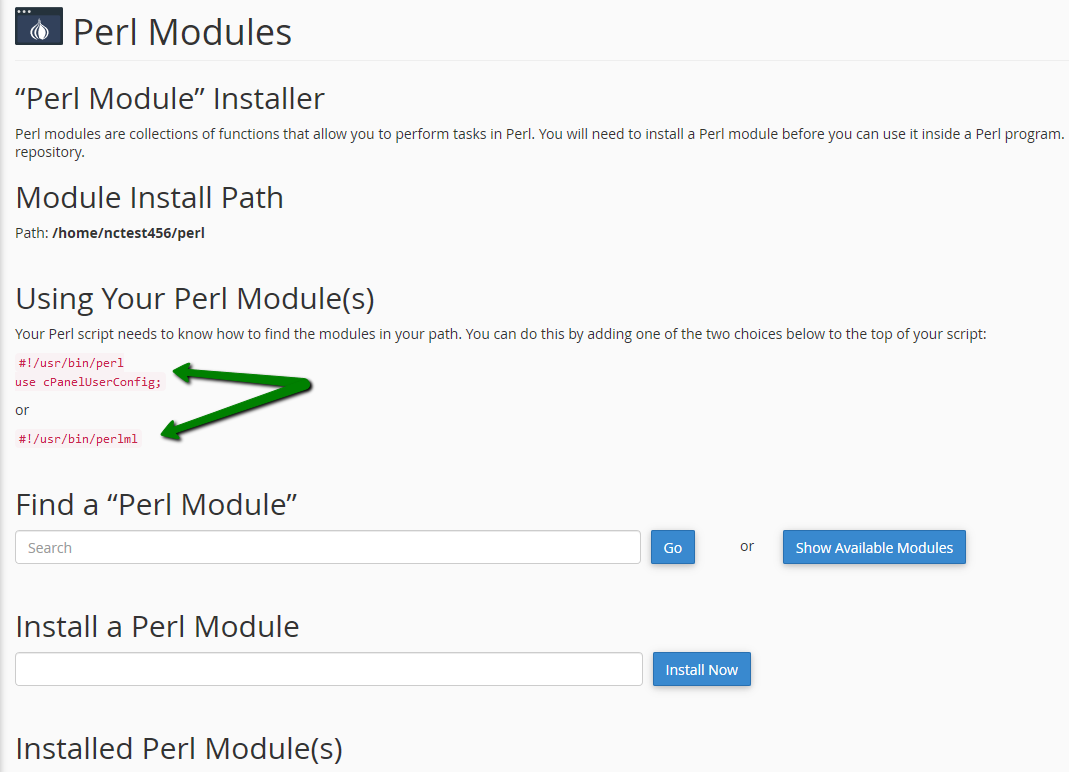
PLEASE NOTE: In order for the newly installed module to work correctly, the following lines should be added at the top of your script:
#!/usr/bin/perl
use cPanelUserConfig;
or
#!/usr/bin/perlml
The users of Stellar Plus and Stellar Business hosting packages can find these two options in the Perl Modules menu:

We hope that this article will help you installing Perl modules on our servers.
That's it!
"Our guide will help you understand the underlying principles of WordPress optimization"
Rasalina Willamson
Ut enim ad minima veniam, quis nostrum exercitationem ullam corporis suscipit laboriosam, nisi ut aliquid ex ea commodi consequatur Quis autem vel eum iure reprehenderit qui in ea voluptate velit esse quam nihil molestiae
Share this Post
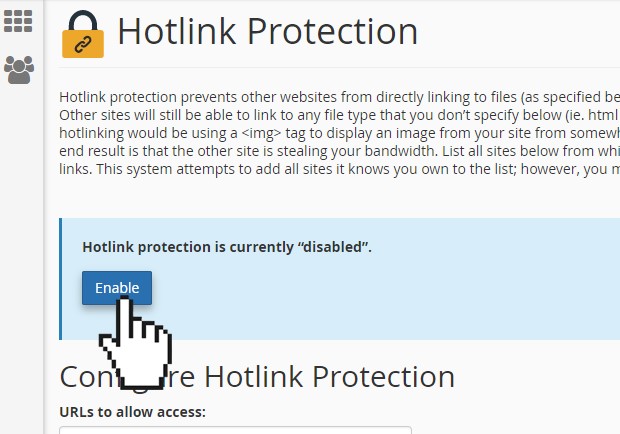
How to set up hotlink protection
By TisHost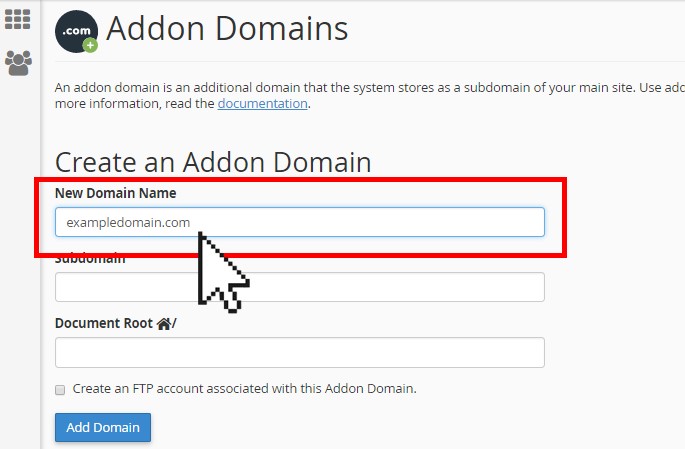
Recent News
-

-

How to Create Addon Domain1
By TisHost -

How to add custom error pages1
By TisHost -

How to use File Manager in cPanel1
By TisHost -


Trusted By
900+
Client World wide
24x7x365
Professional Technical Support
Providing Cloud
Services
Since 2008
Network Uptime
99.9%
Server Uptime