How to block IPs from accessing your website
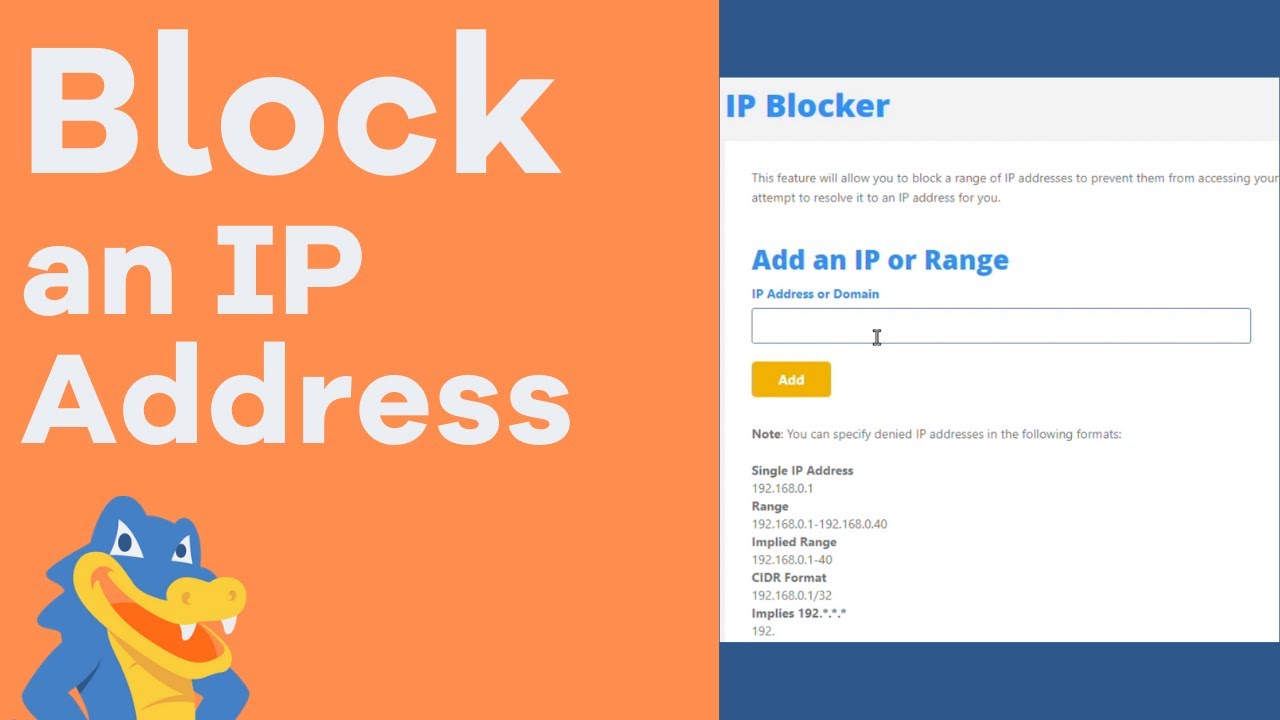
You can block someone's Ip addressing using a server control panel like cloud panel. You can also use methods such as firewall software, configuring router setting, or implementing specific rules to prevent access from that Ip.
Sometimes you might need to prevent access to the website or whole hosting account for specific visitors, for instance, when you are developing a website or in case of DDoS attacks.
Below you can find guidelines on setting up an automatic IP block, a manual IP block and a block from a specific country:
Automatic IP block
Manual IP block
Automatic IP block
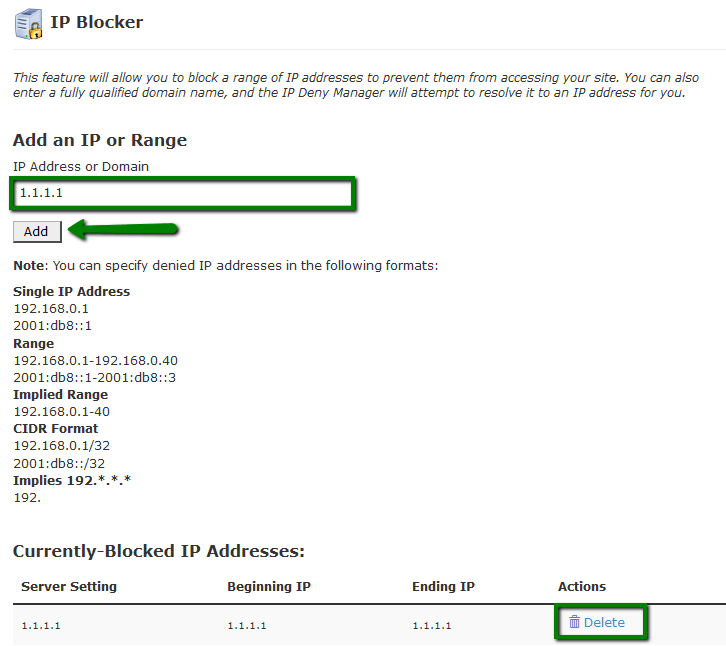
For an automatic IP block, cPanel provides a special IP Blocker tool.
NOTE 1: IP Deny Manager is available for all shared hosting plans starting from the Professional/Stellar Plus one. So if you have a Value/Stellar plan with us, you should set denying rules in the .htaccess file manually.
NOTE 2: Sometimes, it is easier to block all and allow access for certain IPs. Such rules are to be manually configured in the .htaccess file, as IP Deny Manager provides the possibility only to block IPs.
NOTE 3: IP Deny Manager blocks access to all hosted domains and services under your account.
To block an IP automatically, follow the steps below:
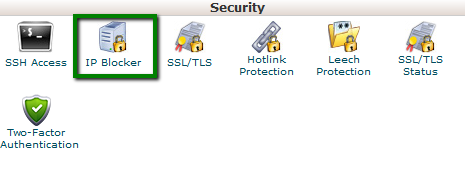
1. Log in to your cPanel and navigate to Security section > IP Blocker menu.
for cPanel paper_lantern theme:

for cPanel x3 theme:
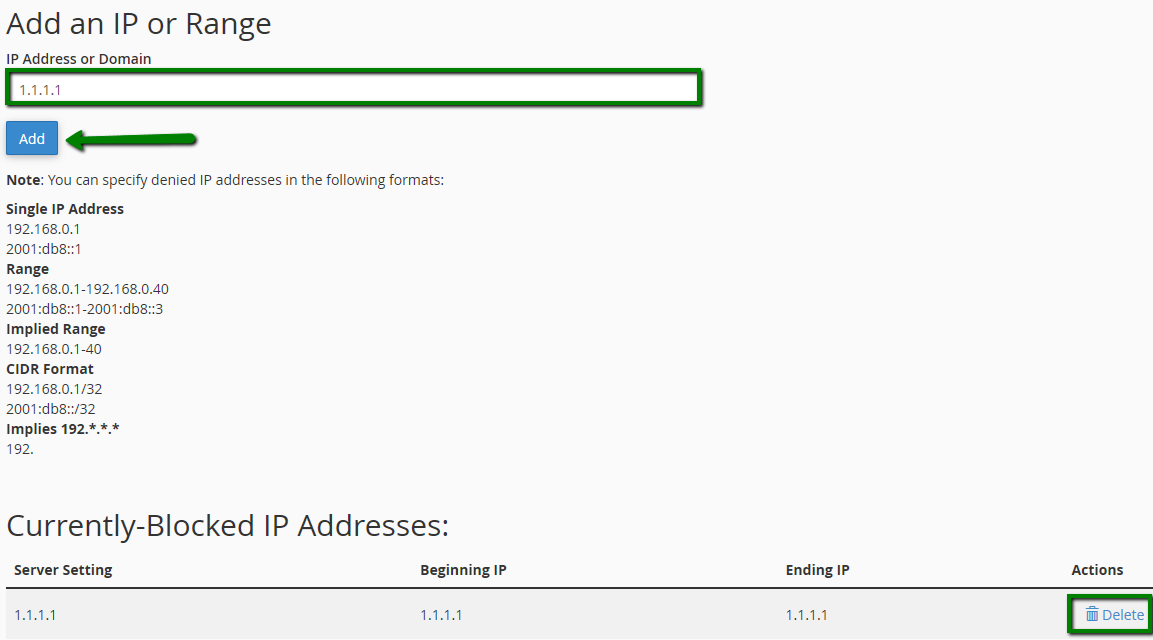
2. Enter the IP address that should be blocked into IP Address or Domain field and click on Add button. It will be added to the list of blocked IPs.
You can always unblock the IP by clicking Delete next to the IP address in question.
for cPanel paper_lantern theme:
for cPanel x3 theme:
Manual IP block
Below you can find several examples for manual blocking configuration.
These lines need to be added to the .htaccess file under all existing rules
- block users with the X.X.X.X IP address, allow access to everybody else:
Require all granted
Require not ip X.X.X.X
- block all visitors except for the specific admin IP for example, or yourself
Require all denied
Require ip X.X.X.X
Require ip Y.Y.Y.Y
- redirect visitors from X.X.X.X IP address to another URL
RewriteCond %{REMOTE_HOST} ^X.X.X.X$
RewriteRule .* http://example.com [L,R=301]
- redirect all requests, except for the ones coming from X.X.X.X IP address to another URL
RewriteEngine On
RewriteBase /
RewriteCond %{REMOTE_HOST} !^X.X.X.X
RewriteRule .* http://example.com [R=302,L]
Do not forget to replace X.X.X.X with the IP address you would like to allow or block.
To block/allow access from a specific country, you need to list all IP subnetworks that belong to this country.
This can be quite challenging for manual configuration, so it is recommended to use special online tools that have access to such country-specific IP databases.
Example of such an online resource is here.
You will need to choose the country and then copy the generated code to your .htaccess file.
The code will look like as follows:
- block access from a specific country
Require all granted
Require not ip 81.52.168.0/23
...
Require not ip 188.138.10.163/32
Require not ip 188.138.78.129/32
- allow access from one specific country
Require all denied
Require ip 81.52.168.0/23 ... 188.138.10.163/32 188.138.78.129/32
That's it!
"Our guide will help you understand the underlying principles of WordPress optimization"
Rasalina Willamson
Ut enim ad minima veniam, quis nostrum exercitationem ullam corporis suscipit laboriosam, nisi ut aliquid ex ea commodi consequatur Quis autem vel eum iure reprehenderit qui in ea voluptate velit esse quam nihil molestiae
Share this Post
Trusted By
900+
Client World wide
24x7x365
Professional Technical Support
Providing Cloud
Services
Since 2008
Network Uptime
99.9%
Server Uptime


