How to use User Manager in cPanel. Can I create a separate cPanel user?

The User Manager menu on cPanel allows you to manage your Subaccounts. Subaccounts use the same login and password information for email, FTP, and Web Disk services. The system synchronizes the password of each of the Subaccount's allowed services.
The User Manager interface also allows you to merge email, FTP, and Web Disk accounts into a single Subaccount, or link existing service accounts to Subaccounts.
NOTE: This interface does not allow you to create new cPanel accounts. To do this, you’ll need to purchase a Reseller package.
Also, it is not possible to assign another user to the same cPanel account with any hosting plan because of the file system configuration.
In order to manage Subaccounts in User Manager follow the instructions below:
Add Subaccount
Subaccount services
Logging into a subaccount
Edit Subaccount
Delete Subaccount
Add Subaccount
1. Log in to your cPanel >> Preferences section >> User Manager menu:
for cPanel Basic theme:

for cPanel retro theme:

2. Click on Add User.
for cPanel Basic theme:

for cPanel Retro theme:

3. Enter the user information for the new Subaccount:
Full Name: First and last name of the user
Username: Username for the Subaccount
Domain: Domain name for the Subaccount
Contact Email Address: The system sends account notifications and password reset confirmations to this email address

4. Choose one of the following options:
- The user will set the account password - the user will receive an email with instructions on how to set the password to the email address you added earlier

- Set the user’s password - you set the password on behalf of the user. The password should be entered and confirmed in the appropriate text boxes - as shown below. Keep in mind that it is important to choose a secure password.

5. Select the Subaccount's services.
6. Click on Create to finish, or Create and Add Another User to add a second new account:

Subaccount services
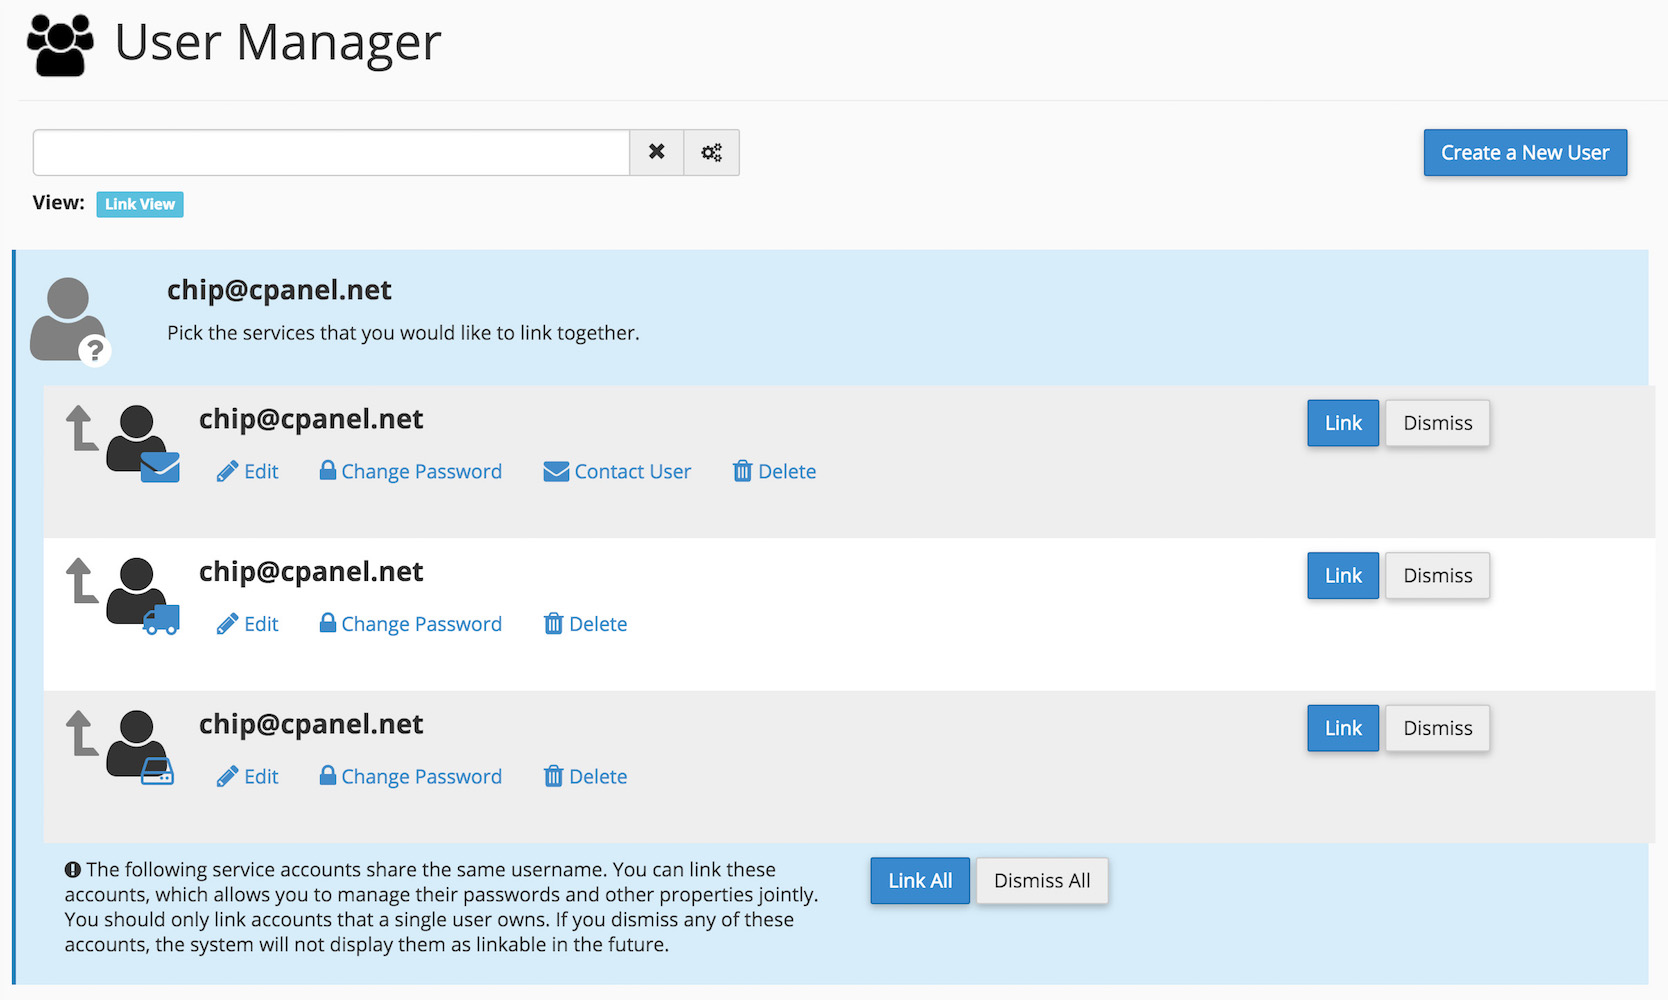
If the Subaccount's username matches the username of the existing Email/FTP/Web Disk account, the interface will prompt you with the option to link or cancel the new account creation.
To link the account with the Subaccount, click on Link and the existing Email/FTP/Web Disk account will be attached to the Subaccount;
If you do not wish to link the account with the Subaccount, click on Dismiss:

Email service allows you to enable the Subaccount's email address, i.e., the user will get a username@domain.com email box.
The Quota option defines how much hard drive space the Subaccount may use to store emails.

FTP service allows you to manage your website's files, i.e., the user will get a username@domain.comFTP account.
The Quota option defines how much hard drive space the Subaccount user may use in their specified home directory.
The Home Directory text box allows you to specify the Subaccount's FTP home directory.

The Web Disk utility allows you to manage and manipulate files on your server in multiple types of devices (for example, your computer, mobile phone, or certain types of software).
for cPanel Basic Theme:
The Home Directory text box allows you to change the Subaccount's Web Disk home directory.
Permissions allows you to specify the Subaccount's home directory permissions:
- Read-Write — This setting grants this Subaccount access to read, download, list and write files inside the directory.
- Read-Only — This setting only grants this account access to read, download and list the files inside the directory.

for cPanel Retro Theme:
The Home Directory text box allows you to change the Subaccount's Web Disk home directory.
Permissions allows you to specify the Subaccount's home directory permissions:
- Read-Write — This setting grants this Subaccount access to read, download, list and write files inside the directory.
- Read-Only — This setting only grants this account access to read, download and list the files inside the directory.
You must enable Digest Authentication if you use Windows Vista, Windows 7, Windows 8, or Windows 10, in order to access Web Disk over a clear text, unencrypted connection.
You do not need to enable Digest Authentication if you meet the following conditions:
- The domain has an SSL certificate signed by a recognized certificate authority.
- You can connect to Web Disk with SSL over port 2078.
NOTE: Do not enable Digest Authentication if the domain uses a signed SSL certificate.

Logging into a subaccount
NOTE: If you selected The user will set the account password when you created the Subaccount, the user must follow the steps in this guide to set their password.
After you create a Subaccount, you can use several methods to access it:
- To log in to Webmail and access your email Subaccount, navigate to https://example.com:2096, where example.com represents your domain name or server IP address. Then, enter the Subaccount username and password. For more information, check this article.
- To use FTP features, log in via an FTP client. For more details, check this guide on how to access the hosting account via FTP.
- To use Web Disk, connect through your local computer’s operating system or via a third-party client. Here you may check the instruction on how to configure Web Disk on Windows.
Edit Subaccount
To edit a Subaccount, click on Edit:

You can adjust the following Subaccount properties within this section:
- Full name — First and last name of the user
- Contact Email Address — An alternate email address for the Subaccount's user
- Email, FTP and Web Disk — The Subaccount's access to email, FTP, and Web Disk services
In the accounts list, the cPanel account and logs account include a star on their avatar. You cannot edit these accounts in this interface due to system configurations as they are the default accounts.
Delete Subaccount
To delete a Subaccount, click on Delete and then confirm that you wish to delete the account.
PLEASE NOTE: If you delete a Subaccount, the system will remove all of the Subaccount's services.

In the accounts list, the cPanel account and logs account include a star on their avatar. You cannot remove these accounts due to system configuration as these are the default accounts.
"Our guide will help you understand the underlying principles of WordPress optimization"
Rasalina Willamson
Ut enim ad minima veniam, quis nostrum exercitationem ullam corporis suscipit laboriosam, nisi ut aliquid ex ea commodi consequatur Quis autem vel eum iure reprehenderit qui in ea voluptate velit esse quam nihil molestiae
Share this Post
Trusted By
900+
Client World wide
24x7x365
Professional Technical Support
Providing Cloud
Services
Since 2008
Network Uptime
99.9%
Server Uptime


